
Credit: gldproducts.com
Step-by-Step Instructions:
A dartboard is a timeless addition to game rooms, bars, and man caves, but improper installation can ruin the experience. This guide covers official dartboard height, throwing distance, tools, and pro tips to ensure your setup meets tournament standards and enhances gameplay.
Why Proper Dartboard Setup Matters
Ensures fair play and accuracy.
Prevents wall damage and safety hazards.
Extends dartboard lifespan.
Primary Keywords: How to hang a dartboard, dartboard setup, dartboard height and distance.
Secondary Keywords: Dartboard regulations, mounting a dartboard, dartboard backboard.
Tools and Materials Needed
Tape Measure: For precise height and distance measurements.
Pencil: Marking drill points.
Drill & Bits: Creating pilot holes.
Screws & Wall Anchors: Secure mounting (use masonry anchors for concrete).
Level: Ensure the board isn’t tilted.
Stud Finder (optional): Locate studs for heavier boards.
Dartboard Backboard: Protects walls from stray darts.
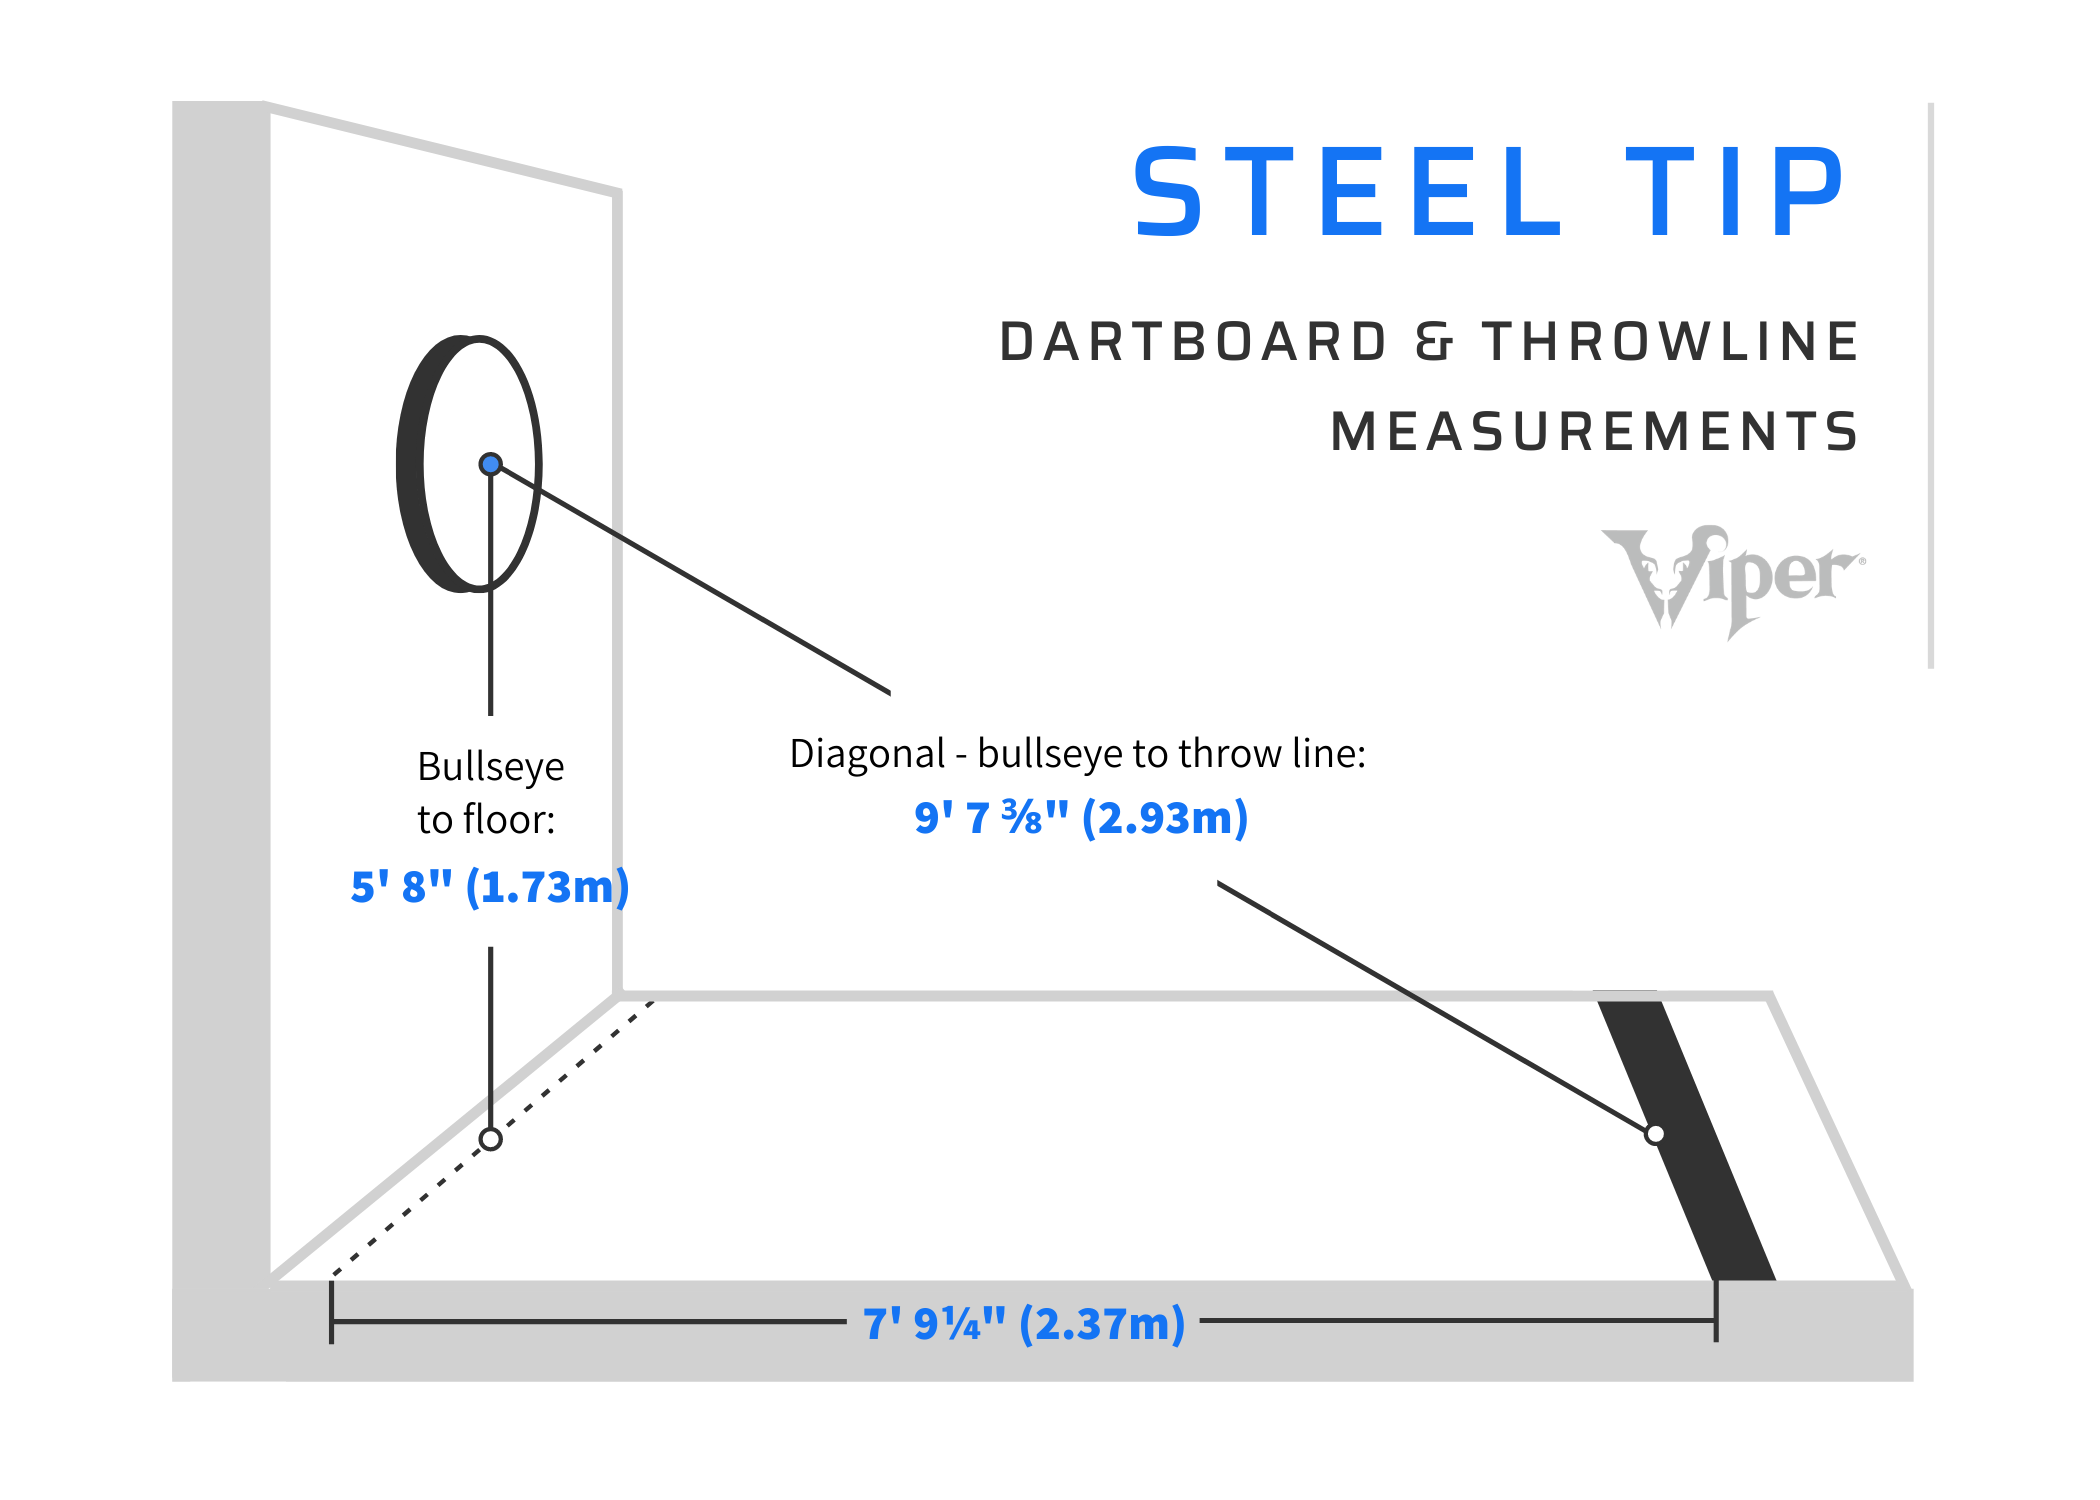
Step 1: Official Dartboard Height and Throwing Distance
Height: 5’8” (68 inches) from the floor to the bullseye center.
Throwing Distance: 7’9.25” (93.25 inches) from the board’s face to the oche (throw line).
Pro Tip: Use painter’s tape to mark the oche temporarily.
Step 2: Choosing the Right Location
Avoid high-traffic areas to prevent accidents.
Ensure adequate lighting (install LED lights to reduce shadows).
Use a dedicated wall or dartboard cabinet for protection.
Step 3: Mounting the Dartboard
Mark the Bullseye Height: Measure 68” up the wall and pencil a point.
Locate Studs: Use a stud finder for secure mounting (critical for bristle boards).
Drill Pilot Holes: Match the dartboard’s mounting holes.
Attach the Bracket: Secure with screws and anchors (use toggle bolts for drywall without studs).
Hang the Dartboard: Slot it onto the bracket.
Check Level: Adjust until the board is perfectly horizontal.
For Concrete/Brick Walls: Use a masonry drill bit and anchors.
Step 4: Setting Up the Throw Line (Oche)
Measure 93.25” horizontally from the board’s face.
Apply permanent markers like tape, a rug, or a raised wooden oche.
Alternative: Use the diagonal method (99.25” from bullseye to floor for verification).
Step 5: Safety and Accessories
Backboard: Cork or foam surrounds protect walls.
Lighting: Install a dedicated dartboard light to eliminate glare.
Floor Protection: Use a mat to prevent dart tip damage.
Dartboard Maintenance Tips
Rotate Regularly: Extend bristle board life by rotating numbered sections.
Tighten Screws: Check monthly to avoid wobbling.
Clean Gently: Wipe with a damp cloth; avoid chemicals.
Common Mistakes to Avoid
Incorrect height/distance.
Mounting without studs or anchors.
Skipping the backboard.
Poor lighting.
FAQs
Q: Can I use Command Strips to hang a dartboard?
A: No—dartboards are too heavy; screws are safer.
Q: What if my room is too small?
A: Opt for soft-tip darts with shorter distances or adjust rules casually.
Q: How high for kids?
A: Lower the board but maintain proportional distance.
Conclusion
A flawless dartboard setup elevates your game and ensures durability. Follow this guide to nail the regulations, prioritize safety, and enjoy endless fun. Double-check measurements, invest in a backboard, and rotate your board regularly. Now, grab your darts and aim for that bullseye!